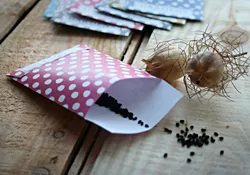
If you have favourite plants you like to grow every year it makes sense to harvest your own seeds to sow. These pretty seed envelopes are fun to make and make thrifty use of old issues of Gardens Illustrated. Simply follow our fold-by-fold guide below to create your own origami seed packets.
You may also like
- Everything you need to know about planting seeds
- How to save tomato seeds
- Seven seed boxes and tins for easy storage
And if you want something a bit more professional, we've provided a specific seed packet template you can download and fold into an envelope. Scroll down to get the download.
How to make your own seed packets
Watch how to make your own seed packets
Step-by-step-guide to making your own seed envelope
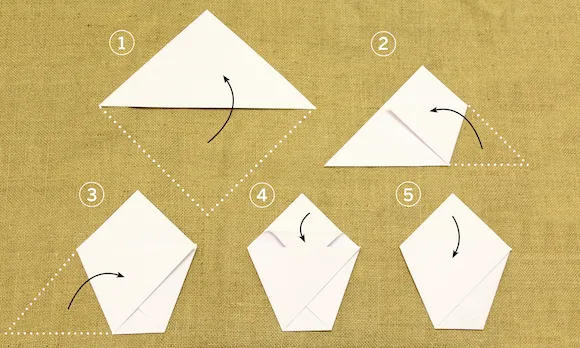
- Begin with a square piece of paper. Fold it diagonally into a triangle and position so the longest side is facing you.
- Fold the bottom right corner up to meet the centre of the opposite side so there is a straight edge along the top.
- Repeat with the bottom left corner, again meeting the opposite side. Both corners should line up across the top edge.
- Tuck the first of the two triangles at the top into the triangular pocket created by making the previous fold in step 3.
- You will see that you now have an envelope that you can fill with seeds. Once filled, close by tucking the remaining top triangle into the same fold as in step 4.
Tip: Use pages from old copies of Gardens Illustrated and each time you fill a new packet, you will be reminded of your favourite features.
We also have a handy seed packet template for you to download
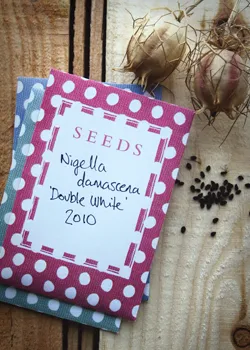
We all love the process of collecting seed from plants in our gardens, and even better sharing them among friends, so we decided to create our own Gardens Illustrated DIY seed packet template which you can download to print out and then make at home.
In eight subtle colours featuring a polka-dot design, there is a generous space on the front of the template for you to write the plant's name and any other notes on where harvested, flower colour, sowing instructions etc.
Download the PDF below and follow the simple instructions to make your seed packet template. You will need a printer (preferably colour), A4 paper, scissors and double-sided tape/glue. And some seeds, of course!
It's a great way to recycle waste printer paper that's already printed on one side, or you could even experiment with coloured paper.
Click the link below to download a PDF template for the seed packets.


